Thursday, August 29, 2013

Auto Detailing Guide - Interior

Overview (Return to Top)

Caring for your interior is just as important as your exterior. You spend the most time inside your vehicle and your passengers often take notice of how clean, or not so clean, your interior is. It's important to protect your interior trim and leather from harmful UV rays that can potentially dry out and fade your interior. Keep your interior looking like new so you enjoy getting into your vehicle each and every time.

Carpet Care (Return to Top)

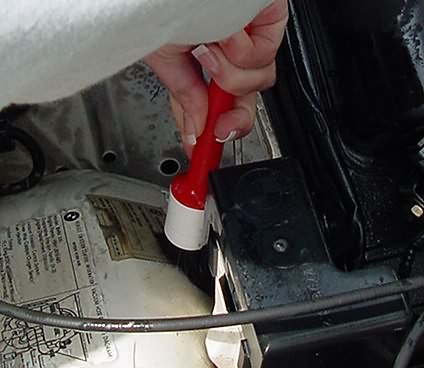
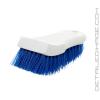
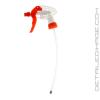
Caring for your fabrics is pretty simple, but unfortunately your carpets often see the most wear and tear since you are constantly bringing in dirt, debris and contamination from your shoes. First off remove your mats and be careful not to dump dirt and pebbles on the mat on to the carpets while removing them. A quick vacuum will help remove the obvious build ups if you haven't cleaned the carpets and mats recently, but don't get fussy you'll vacuum them again later in this process. A firm bristle brush is one of the most underrated tools in detailing and can be used next to loosen debris embedded in the carpets. Start brushing in a corner and work your way towards one mid point from all corners and sections. Once you've made a pile of debris, use a vacuum to remove it. Continue this same process for each fabric section and if you have fabric seats start with them and move on to the carpets and mats second.
After making an initial pass with the brush and vacuum, spot treat any stains with a fabric cleaner. Most cleaners should dwell on the fabric for 1 - 2 minutes, then scrub them again with a bristle brush in multiple different directions with medium pressure. The brushes bristles will get in between the carpet fibers and help bring contaminants to the surface. At the same time the bristles will break up stains and build ups on the surface. If stubborn stains persist spray them again with your cleaner and dip your brush in a tray of hot water before scrubbing them again with medium to firm pressure. When you are satisfied with the cleaning, use the vacuum if needed to remove any visible debris.
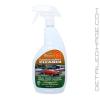
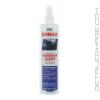
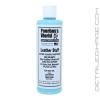
Once your carpet has completely dried, we recommend protecting your carpet. The 303 High Tech Fabric Guard is a great example of a fabric protectant. This will help prevent stains from forming in the future and will make cleaning your fabrics easier in the long run. Simply mist some product onto your carpet, mats and upholstery for a barrier of protection and you are done. The carpets will continue to look and feel completely natural but they will resist moisture and stains

Interior Trim (Return to Top)

Most interior trim (dashboard, console, doors, etc.) consists of a combination of vinyl, plastic, rubber and leather, which can be cared for with many of the same products, so there is no need to get a product for each material. Some products are strictly meant for cleaning, some are just for protection and others have a combination of both. In general products strictly meant for cleaning or protection are more effective than options that do both. If you need a serious cleaning then we highly recommend picking up a separate cleaner and protectant. Even if your vehicle is relatively clean we recommend at a minimum of 1 - 2 times per year you use just a cleaner on the interior for a more thorough cleaning. If your vehicle is well maintained than you may be able to use a cleaner and protectant in one bottle for maintenance cleanings.
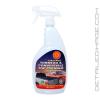
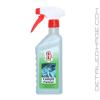
For the vinyl, plastic, rubber, carpets and mats the 303 Cleaner and Spot Remover is a great product. It's a highly effective and very versatile formula that is very gentle. If you want some outstanding protection afterward the 303 Aerospace Protectant is a great choice for rubber, leather, vinyl, plastic, etc. It leaves a nice dark finish that is not glossy or greasy while providing outstanding UV protection. If you want a cleaner and protectant in one the Einszett Cockpit Premium is a great choice for rubber, plastic, vinyl, etc. It has some light cleaning agents but also leaves UV protection that looks stunning with zero oily residue left behind.

Leather Care How-To (Return to Top)

Beautiful leather is synonymous with clean leather and when the leather is looking its best it is a source of tremendous pride for automobile owners. Leather seats are one of the very first things we notice when entering a vehicle and dirty seats not only look bad but it can harm the long term health of the seats. Modern day leather can be comprised from a variety of natural and synthetic materials. Very few vehicles actually use just raw leather and many of them have a coating on them to help protect against wear and tear. All of these material are prone to drying out and breaking down over time so regular maintenance is essential.
Caring for virtually any type of seat involves the same basic steps which are cleaning, conditioning and protection. Inevitably over time dirt, dust, human oils, etc. work themselves deep in to the seats and can be quite challenging to remove. A good leather cleaner should be able to safely separate those contaminants and help bring them to the surface for removal. A quality leather conditioner can help keep the leather soft and flexible yet strong and durable. Cleaners and conditioners should not leave a glossy or oily finish behind. Lastly some protection can help prevent UV fading while preserving the color and finish for decades to come. With proper care the seats will look and feel outstanding year round while increasing the resale value.
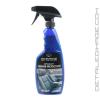
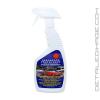
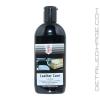
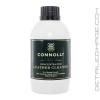
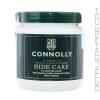
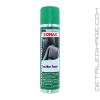
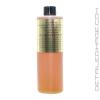
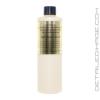
In general products that clean and condition in one bottle are not as effective as a separate cleaner and conditioner. The trade off with using separate products is that it can cost more and they may take more time to apply. If interested in just a leather cleaner we recommend the Leatherique Prestine Clean or the Connolly Leather Cleaner. For conditioning the Leatherique Rejuvenator Oil and the Connolly Hide Care Leather Conditioner are two top notch choices. If you want to clean and condition in one bottle the SONAX Leather Foam and Einszett Lederpfledge Leather Care are some of the many great choices we have available. For protection afterward the 303 Aerospace Protectant is always a favorite for it's world renowned ability to block UV rays.

Leatherique Leather Care Application

Leatherique leather care products are some of the best in the industry. They have been the product of choice for the Bentley and Rolls Royce Owners Clubs. Leatherique can restore faded, hardened and neglected leather but it can also maintain brand new leather in great condition. They work extremely well on synthetic leathers "leatherette", coated leathers, vinyl seats and so much more! Both products use all natural active ingredients with no dyes to provide high quality leather care. The process leaves the seats feeling completely natural without a greasy or oily residue. The application is a two step process consisting of the Leatherique Rejuvenator Oil and Leatherique Prestine Clean. If you are working on seats that have not been well cared for recently you can expect to use more product, but well maintained or newer seats will need less product. The application of these products is unique in that the conditioner is applied first and the cleaner is applied second.
Start off using the Leatherique Rejuvenator Oil, which will penetrate the surface and condition your leather top to bottom. Apply the product liberally on your leather seats with either your bare hands or a soft applicator pad (i.e. terry cloth applicator). You can use a leather brush to help work the product deeper into the leather's pores if desired. Don't forget to do the head rests, back of the seats, sides, bolsters, arm rests and really work it in to creases and folds. If the product readily absorbs in to the seat you can apply more product until there is some visibly left on the surface. Each seat may need anywhere from .5 ounces to 2 ounces. When you are done back your vehicle into direct sun and if it's not sunny out you can use a hair dryer or turn on the heated seats. The heat will help open the pores of the leather and thin out the Rejuvenator Oil so it can penetrate in to every crevice of the leather. Ideally, you want to let the Rejuvenator Oil sit for a full day but a minimum of one to two hours still works very well. If none of these heat sources are are available to you don't worry the product will still work well on it's own, just let it sit the minimum of one to two hours.
After you've let the product sit on the leather for as long as possible, the surface may be a bit tacky to the touch, which is a good sign. At this time the Rejuvenator Oil has removed many of the embedded contaminants and forced them up to the surface. Now you will apply the Prestine Clean directly on top of the surface with a clean applicator pad (i.e. terry cloth applicator) or clean microfiber towel. Apply anywhere from .5 to 1.5 ounces per seat, working it in thoroughly with light pressure. Let the Prestine Clean sit on the leather for another 15 to 30 minutes. Take a slightly damp towel, using warm water, and remove both products from the leather with light pressure. Immediately follow up with a dry towel to remove any visible moisture. The seats should now look and feel incredible with no greasy or oily mess left behind at all. The leather will have a completely natural finish and be well nourished to help prevent future problems.

Professional Leatherique Application Guide

See how one of the top professional detailers in the US uses Leatherique to restore neglected leather.
Leatherique before and after

Facts and Tips (Return to Top)

  • A clean interior shows you take pride in your vehicle
  • Cleaning and conditioning your leather on a regular basis will keep the leather looking great year round
  • Protect your leather with a product that blocks UV rays
  • Leather seats should never feel greasy or oily and avoid any product that adds a shine to the leather
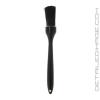
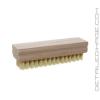
  • A scrub brush is arguably the most important tool to clean any fabric
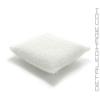
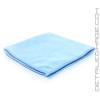
  • Microfiber towels are great for interior cleanings because they collect and trap dust particles
  • As you exit the vehicle try to not twist on the seat, over time this can remove material from the surface
  • Make sure you and your passengers don't have any sharp buttons, belts, etc. on your bottom side that can harm the leather
  • Keep the interior clean by removing any wrappers, bottles and trash as soon as possible
  • Adding an air freshener is an easy way to create a smile
Here are a few articles related to Interior Care from our Ask-a-Pro Detailer Blog:
 

How To Detail Your Car's Engine

Engine detailing is nothing more than cleaning the exterior of the engine and the engine compartment, and applying dressing to protect and beautify the engine.  It's very easy to do, and requires no more than 45 minutes to an hour every couple of months.


ENGINE DETAILING

The first step in cleaning your engine is to remove the excess debris that gets trapped in your hood, grille and vent openings.  This is particularly true if you live in an area with four seasons.  If you have compressed air available, this is the best way to remove old leaves, dust and such.  If you don't, a simple hand brush will suffice.
The next very important step is to prepare your engine for getting wet.  You must cover all sensors, the distributor, spark plug openings and any electrical devices that have the potential for water accumulation (which could cause a short).  Use plastic baggies to cover these items.  Be sure to use tape or rubber bands to hold the plastic bags in place.  You're only trying to prevent the majority of the water from getting in; it does not need to be watertight.  The engine environment should already be waterproof.  The baggies are just a precaution.
To loosen the grease accumulated on your engine and the engine compartment, start your engine and allow it to warm for a few minutes.  The best temperature for cleaning your engine is warm to the touch, but not hot.  If you're able to hold your hand to the engine without saying "Ouch," then the temperature is just about right.
 

APPLYING DEGREASER

After warming the engine and protecting sensitive areas, you're ready to apply an engine degreaser. Although they are quick and easy, I warn people against the use of harsh petroleum-based cleaners in the engine compartment.  They quickly cut through grease and grime, but they also deteriorate your rubber and vinyl components (not to mention what they do to our environment!).  As an alternative, use a citrus or water-based cleaner.  A great alternative to harsh solvents is Detailer's Pro Series Engine Degreaser.  It’s an environmentally safe cleaner that makes a great alternative to those petroleum-based cleaners. 
When applying your engine degreaser, it's best to start from the lower areas and work your way up.  This prevents the degreaser from dripping on you as you clean the underside areas.  One important thing to remember: the engine degreaser will remove the wax from the painted surfaces of your car.  If you get degreaser overspray on your fenders, plan on re-waxing these areas.
When you have applied your engine degreaser, be sure to wash any excess cleaner from the exterior painted surfaces of the fenders, hood and grille.  I like to spray these areas with water first.
Depending on the amount of accumulated grease, allow the degreaser to soak on the engine for 3 to 5 minutes.  During those few minutes, you want to keep an eye on the degreaser.  You don’t want it to become dry on the surface.  For light to mild levels of grease, you will not need to use a brush on the engine and other surfaces.  For heavy soil, you can use a long-handled brush (parts brush) and car wash solution to provide additional cleaning action prior to hosing off the degreaser.  Agitating the grease with a soft to medium bristle brush is the most efficient way to break up the grime during rinsing.
 
Use a soft parts cleaning brush get into cracks and around parts.  If your engine compartment has a heavy accumulation of dirt, you may need to spray with cleaner, brush, and rinse several times. An old toothbrush works great in tight areas that other brushes can't reach.


HOSING ENGINE OFF

When you are ready to remove the degreaser, hose down the entire engine compartment and surrounding surfaces with plenty of water.  If you're using a high-pressure nozzle, be careful that you don't get the nozzle too close to the covered electrical connectors.  Using an attachment like the Fire Hose Nozzle gives you better control and a more even flow than most hose attachments.  Allow your engine to air dry for several minutes before using a towel to wipe down all accessible parts.  Remove the plastic bags.  The heat from the engine will assist in the drying process; however, do not allow the engine to air dry, as this will result in water spots.  When dry, start your engine and allow it to run for a few minutes.
*Here's a handy tip for you.  After your final rinse use your vacuum (if it can blow forced air) or an air compressor to blow water off the engine for a spot-free finish.  The Vac B' Blo vacuum makes quick work of the job.
 
Rinse with a stiff stream of water using a Fire Hose Nozzle to remove as much of the grease and grime as possible.  Be sure to avoid electrical connections and other sensitive areas.  After rinsing, start the engine immediately.  Allow it to run for about 5 minutes to help dry things out.


PROTECT AND BEAUTIFY

When everything is dry, and your engine has cooled,  you should apply a coating of engine protectant.  If you don't have an engine protectant, use your rubber and vinyl protectant to coat your hoses, wires, and plastic shields.  To add a quick shine and protection to the painted surfaces in the engine compartment, use a high-quality detailing spray like Pinnacle Crystal Mist Detail Spray.  Just spray it on all surfaces, and wipe off the excess with a clean microfiber towel.  
After drying the engine, spray all of the rubber hoses and plastic parts with a rubber and vinyl protectant, like303 Aerospace Protectant.  Wipe off excess protectant and buff to a nice satin finish.
Don't underestimate the need to protect your engine after detailing.  The factory applies a heavy coating of high temperature wax that protects for several years.  When you remove this coating corrosion will begin.  One of the few products available to do a proper job is Sonus Trim and Motor Kote.  It is a spray-on and walk away product. Before using a product like Sonus Trim & Motor Kote mask off with plastic or large detailing towels.  This will help avoid a cleaning up a big mess.

CAR ENGINE DETAILING SUMMARY

Many car enthusiasts find that detailing their engine is just the beginning of a long road toward engine beautification.  Other embellishments include polishing aluminum parts, painting key parts with bright colors, and adding chrome.  Whatever you choose, make it your style, and have fun.

How To Wax Your Car to Perfection

ABOUT CAR WAX AND CAR SEALANTS

It was European coach builders that first applied coatings of animal fats and wax to protect the custom paint on their horse-drawn carriages.  This tradition has endured over 100 years and is still a great way to protect the paint on modern-day coaches.
Today, the multilayered auto wax finish on your car, from the primer through the top clearcoat, is only .004 to .006 of an inch thick.  Regardless of how fine the finish is now, it will deteriorate and dull.  Radiant and ultraviolet energy, acid rain, salt, atmospheric pollution, insect fluids and bird droppings wage a constant war on your car's finish.  Car waxing provides an easily renewable, transparent barrier between the finish and a hostile environment.
Auto wax also makes your car, new or old, look better.  Many quality car waxes combine enriching oils that "wet" the surface with protective formulas of Brazilian carnauba or modern polymers for a high-gloss shine. 


SELECTING THE BEST CAR WAX

This brings us to the subject of selecting a car wax.  Car Waxes can be made from a natural wax, usually Brazilian carnauba, or synthetically made of polymers and acrylic resins.
Car waxes and paint sealants make the surface of a car reflect more light.  As a result, the car looks vibrant, looks more alive.  Carnauba-based car waxes add an element of depth and warmth to a car.  Paint sealants(synthetic car wax) create brilliance and sparkle.
 

SYNTHETIC CAR WAX CREAMS AND LIQUIDS

Made from modern polymers or acrylic resins, synthetic waxes offer excellent durability and ease of application.  Quality synthetic waxes have been known to last 6 to 9 months or longer, and typically wipe on and off very easily.  Synthetic waxes create a very bright shine and rarely cloud or streak on the paint.
On the down side, many enthusiasts feel synthetic waxes lack depth and richness.  Black cars can look a little sterile or silvery in the direct sunlight.  And, the mirror-like polymers can collect minor swirls and actually highlight paint flaws.
 

CLEAR NANOTECHNOLOGY POLYMER COATINGS

In 2007 a brand new type of automotive surface protection was created by Ultima Finish Care, the clear sealant.  Ultima clear sealants are nanotechnology polymer coatings that are highly resistant to detergents, acids and hard minerals, like calcium. 
Don't let the nanotechnology jargon confuse you.  The chemical simply creates a full molecular blanket of protection by using molecules, that are much smaller than water or acid molecules, that bind together to form what looks like a chain link fence of protection
Ultima Finish Care is the first and only company to offer a full range of clear sealant products for complete protection of your automobile.
 
The animation above is how Ultima explains their nanotechnology coating.  The most important fact to understand is how the product blocks the harmful elements that cause oxidation and other environmental paint damage.  By creating a tough barrier that is many times smaller than water and acid molecules, these harmful elements cannot penetrate the Ultima coating.
 

WHAT DO AUTOMOBILE CLEAR COAT FINISHES REALLY NEED?

If the purpose of the clear coat is to add depth and gloss to the final paint finish, wouldn’t it be counterproductive to apply anything that does not buff out to be as clear as the clear coat itself?
Carnauba wax in its natural form is not clear. It creates a dull, milky white film on the leaves of the palm tree from which it is harvested. Have you experienced the white stain residue most Carnauba waxes leave in cracks and crevices after waxing? It follows that Carnauba wax will distort the perfectly clear appearance of a new or well-maintained clear coat finish.
What the modern clear coat finish requires is proper cleaning and light polishing to remove fine cobweb scratches and swirl marks, and clear, durable protection. Carnauba wax cannot meet this demand.  My personal recommendation for all cars with a clear coat finish is Ultima Paint Guard Plus Paint Sealant.


CAR WAX SUMMARY
Regular auto wax care is necessary for protecting your car's paint from the elements.  In addition to sealing and protecting, car waxes and auto sealants also improve the appearance of freshly washed and polished paint.  If you use the right products, you can successfully layer waxes and sealants to make your paint look deeper and almost liquid.
From: http://www.autopia-carcare.com/inf-wax.html

Thursday, August 15, 2013

How to Detail a Car

Edited by Supershadow, Maxwell K, Flickety, DifuWu and 10 others

Detailing a car requires going way beyond the usual vacuum and wash job. It means paying attention to the tiny details that add up to make the car look show-worthy. Begin with the interior so that you don't have to worry about messing up your exterior while detailing the inside. Here's how to detail a car.


Part One: Detailing a Car's Interior

  1. 1
    Remove floor mats and vacuum the mats, floor, trunk, upholstery, rear parcel shelf, if you have one, and the dash. Slide the seats all the way forward and then back to thoroughly vacuum the carpet underneath.

    • Start from the top and work your way down. Dust or dirt that has accumulated up top could fall down; dust or dirt that has accumulated at the bottom will rarely fall up.
  2. 2
    Clean carpet or upholstery stains by applying a foam cleanser and rubbing it in with a damp cloth or sponge. Allow it to sit for a few minutes before blotting dry with a towel. If the stain doesn't come out, repeat. After your final cleaner application, wash the area with a damp sponge and do a final blotting.

    • Make sure to try and get as much dampness from the fabric as possible. Any excessive dampness may promote molding and/or mildew, which does not fall in the definition of detailing a car.
  3. 3
    Repair carpet holes, burns or small permanent stains by cutting the spot out with a razor blade or scissors. Replace with a piece you've cut from a hidden place, such as underneath the seat. Use a water-resistant adhesive to keep it down.

    • Warning: Always ask the owner of the car for permission before doing this step. If you want, have a sample repair that you can show the owner of the car of what the process will look like. If it's done well, this sample will be reassuring.
  4. 4
    Wash rubber floor mats and dry. Apply a non-slip dressing so that the driver's feet don't slip and slide while they're trying to do important things like braking.

  5. 5
    Use compressed air and detailing brushes to get out accumulated dust from the buttons and crevices on the dash and interior doors.

  6. 6
    Wipe hard interior surfaces with a mild all-purpose cleaner. Use an interior dressing like Armor All to finish it off.

  7. 7
    Detail car air vent grilles with detailing brushes. If you're not going to use liquids afterward, your detailing brushes should be a super-absorbant material like microfiber cloth, which picks up dust and dirt efficiently. Lightly mist some spray-on vinyl dressing onto the vent grilles to make them look brand new.

  8. 8
    Clean or shampoo the seats. Cleaning the seats is essential for a good detail. But different seats require different methods. Note that after cleaning, you may have to vacuum out the seats or surrounding area again, as dirt will be loosened up by this process.

    • Cloth interiors: Interiors with nylon or other cloth can be shampooed with a wet-vac extraction machine. Cloth should be adequately dried after extraction has taken place.
    • Leather or vinyl interiors: Interiors with leather or can be cleaned with a leather or vinyl cleaner and then hit softly with a leather brush. Cleaner can be wiped away with a microfiber cloth afterward.
  9. 9
    Condition your leather seats, if necessary. If you've cleaned leather seats with product, now's the time to condition them so that the leather looks visually appealing and doesn't dry out or begin to crack.

  10. 10
    Spray glass cleaner on windows and mirrors and wipe clean. For stronger build-up removal, use 4-ought steel wool on windows. Use plastic cleaner if the gauge cover is made of plastic.

    • Stick with microfiber cloth when you're washing and wiping. If not microfiber, use a clean, lint-free cloth. You don't want to leave fibrous residue all over the inside of the car in the process of cleaning up.

Part Two: Detailing a Car's Exterior

  1. 1
    Brush the wheel rims clean with a wheel brush and wheel cleaner or degreaser. Hit the wheel rims first, as this is where most of the dirt, grime, and grease accumulates and you may need to leave cleaning product on for a while. Allow product to penetrate wheel rims for 30 seconds to 1 minute before brushing.

    • Acid-based cleaners should only can be used on rough-textured alloy wheels, if needed, but not on polished alloy wheels or clear-coated wheels.
    • Gleam up chrome wheels with metal polish or glass cleaner.
  2. 2
    Wash the tires with whitewall tire cleaner (even if you have black-walls). Apply tire dressing. For a glossy finish, let the dressing soak in, or wipe it on and off with a cotton cloth for a matte look.

  3. 3
    Wrap electronic components in plastic under the hood. Spray degreaser on everything, after which spray down with pressure washer.

  4. 4
    Dress up non-metal areas under the hood with vinyl/rubber protectant. For a glossy look, allow the protectant to soak in. For a more matte finish, wipe it off.

  5. 5
    Be careful about tinted windows. Factory tinting is built into the glass itself, so you have to worry less about that, but after-market tinting is more degradable and could suffer from cleaners that contain ammonia and/or vinegar. Check your cleaners before applying to tinted windows.

  6. 6
    Wash your car's exterior with a car wash soap, not dish detergent. Park the car in a shady spot and wait until the car's surface is cool to the touch. Use a deep-pile terrycloth microfiber towel which will trap contaminants and not grind them into the car's surface.

    • Tip: Use two pails — one with sudsy cleaner, the other with water — when you clean. After you dip your cloth into the sudsy water and clean a portion of the car, dip the dirty, sudsy water into the pail with water so that you don't contaminate the cleaning pail.

    • Dishwashing detergent strips the polymers off the paint surface and accelerates the oxidation process.

    • Work from the top down, washing and rinsing a section at a time. Do not allow soap to dry.

    • Take the spray nozzle off the water hose before doing a final rinse to minimize spots.

    • Use a chamois or terry cloth towel to dry; do not let air-dry or soap spots will form.

  7. 7
    Clean the outside of windows with glass cleaner. The glass on newly-detailed cars should shine and reflect, not be dull and grimy. In order to get that reflective polish on the windows,

  8. 8
    Get the caked-on dirt and mud off the wheel wells with an all-purpose cleaner and high-pressure water spray. Add a vinyl dressing to the wells for a dazzling effect.

  9. 9
    Remove bonded contaminants on the car with a liquid clay bar. You can use a traditional clay bar to remove things like sap, but a liquid clay bar is quicker and almost as effective.

  10. 10
    Apply polish or wax (if using both, apply and remove polish first) with a dual-action polisher or orbital buffer or by hand. Rotary buffers should be left to the professionals.

    • Polish is for a glossy look. Wax is a protectant.
    • Use in length-wise sections. Do not move the machine in a circular pattern.
    • Pay attention to doorjambs, around door hinges and behind bumpers, which you will need to do in a circular motion by hand.
    • Let it dry to a haze. Then finish the auto detailing by buffing with the machine. The hard-to-reach areas can be buffed by hand.
(From: http://www.wikihow.com/Detail-a-Car)